The Netgear AC1200 is a popular choice among consumers seeking high-performance wireless routers for their home or small office networks. With its advanced features, reliable performance, and user-friendly interface, the Netgear AC1200 has earned a reputation for delivering fast and stable WiFi connectivity.
In this detailed guide, we’ll explore everything you need to know about the Netgear AC1200, including its specifications, key features, setup process, and tips for maximizing performance.
Understanding the Netgear AC1200
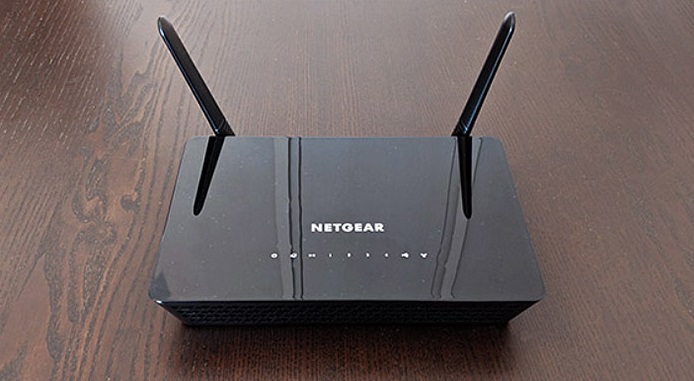
The Netgear AC1200 is a dual-band wireless router that operates on both the 2.4 GHz and 5 GHz frequency bands. It supports the latest WiFi standards, including 802.11ac, and offers enhanced coverage and speed compared to older router models.
With its sleek design and compact form factor, the Netgear AC1200 is designed to blend seamlessly into any home or office environment.
Read Also:
Key Features of the Netgear AC1200
- Dual-Band Technology: The Netgear AC1200 operates on both the 2.4 GHz and 5 GHz frequency bands, allowing for faster speeds and reduced interference.
- High-Speed Performance: With support for the 802.11ac WiFi standard, the Netgear AC1200 delivers speeds of up to 1200 Mbps, making it ideal for streaming HD video, online gaming, and other bandwidth-intensive tasks.
- Advanced Security: The Netgear AC1200 features built-in security features such as WPA/WPA2 encryption, SPI firewall, and guest network access, ensuring a secure and private network environment.
- Easy Setup: Setting up the Netgear AC1200 is a breeze thanks to its intuitive web-based interface and step-by-step setup wizard. Users can easily configure network settings, set up parental controls, and manage connected devices with ease.
- Beamforming+ Technology: Beamforming+ technology enhances WiFi coverage and reliability by focusing the router’s signal directly to connected devices, resulting in improved performance and range.
Setting Up the Netgear AC1200
Setting up the Netgear AC1200 is a straightforward process that can be completed in just a few simple steps:
- Unbox the Router: Remove the Netgear AC1200 router from its packaging and ensure that all accessories are included.
- Connect to Power: Plug the router into a power outlet using the provided power adapter and wait for it to power on.
- Connect to Your Modem: Use an Ethernet cable to connect the Netgear AC1200 router to your modem.
- Access the Web-Based Interface: Open a web browser on a computer or mobile device connected to the router’s network and enter the router’s default IP address (usually “192.168.1.1”) in the address bar.
- Follow the Setup Wizard: The Netgear AC1200 setup wizard will guide you through the process of configuring your network settings, creating a WiFi network, and setting up security features.
Netgear AC1200 Setup
Two methods exist to set up the Netgear AC1200 WiFi range extender.
Method 1 – Netgear AC1200 WiFi range extender setup using the installation assistant.
Method 2 – Netgear AC1200 WiFi range extender setup using the WPS push button.
Netgear AC1200 WiFi Range Extender Setup Using the Installation Assistant.
First, let us discuss the installation assistant and its setup. Below are steps that will help you to set up the Netgear AC1200 WiFi range extender setup using the installation assistant.
Step 1 – Make sure that your WiFi router and your Netgear AC1200 WiFi extender should be in the same place.
Step 2 – Connect the plugs to the power and switch it on.
Step 3 – In your laptop, go to the settings, in that open WiFi manager and connect your WiFi to the extender’s network.
Step 4 – Open Google Chrome or any browser of your choice.
Step 5 – In the address bar, type the myWiFiext.net name.
Step 6 – The login page will open up. Enter your username and password.
Step 7 – If you forgot your password or your username or both, then try contacting your technical experts at toll-free 1-866-504-8616.
Step 8 – When you are done logging in, the installation process of Netgear will start.
Step 9 – The on-screen steps will prompt you to complete the setup, follow those steps, and get done with the setup process of Netgear Ac1200.
Remove the connected extender and take it to another corner of your house anywhere of your wish. But make sure you are not placing it close to any radioactive devices like microwaves, treadmills, refrigerators, Bluetooth gadgets, and washing machines.
Now, again connect all the devices of wireless and wired connections to the newly created WiFi extender network. Doing like this, your WiFi can be boosted by Netgear AC1200 WiFi extender.
Netgear AC1200 WiFi Range Extender Setup Using WPS Push Button
If the above installation assistant method does not seem to be in your favor and finds it difficult then worry not! We got your back! There is another method that will help you set up Netgear AC1200 WiFi range extender setup using WPS (WiFi Protected Setup) push button.
Step 1 – Firstly, switch on your AC1200 WiFi extender.
Step 2 – Press the WPS button.
Sep 3 – When you press the WPS button the LED light will start blinking. This is the sign that your WiFi extender will start connecting to your router.
Step 4 – In some time, you will notice 3 solid LED green lights on your extender. The green is a signal that the configuration between your extender and your router is completed.
Step 5 – If there is no sign of LED light on your Netgear WiFi extender, then try contacting your router experts.
Step 6 – If 5 GHz frequency is supported by your router, then repeat the above-mentioned steps so that you can connect the extender to 5 GHz frequency.
Step 7 – Finally, when you are done completing all the steps remove the plug of the extender, and now you can freely place it in any corner of your house.
Drum rolls! Your installation and setup for the Netgear AC1200 WiFi range extender setup are finally completed. Easily connect all your devices to the Netgear AC1200 WiFi extender without having trouble or an uninterrupted network.
If in case you face problems while connecting to the Netgear AC1200 WiFi range extender setup, then feel free to contact us at 1-866-504-8616 and get solutions quickly.
Tips for Maximizing Performance
To get the most out of your Netgear AC1200 router, consider the following tips:
- Optimize Router Placement: Place the router in a central location away from obstructions and interference sources for optimal WiFi coverage.
- Update Firmware: Keep your router’s firmware up to date by checking for and installing updates regularly to ensure compatibility and security.
- Use Wired Connections: Whenever possible, use wired Ethernet connections for devices that require high-speed and reliable connectivity.
- Enable Quality of Service (QoS): Use QoS settings to prioritize network traffic and ensure smooth performance for bandwidth-intensive applications such as streaming and gaming.
- Monitor Network Activity: Use the Netgear Genie app or web-based interface to monitor network activity, view connected devices, and troubleshoot issues as they arise.
FAQs
- Can I use the Netgear AC1200 with my existing modem? Yes, the Netgear AC1200 is compatible with most cable and DSL modems, allowing you to easily upgrade your existing network setup.
- Can I set up a guest network with the Netgear AC1200? Yes, the Netgear AC1200 allows you to set up a guest network with its built-in guest network feature, providing separate WiFi access for guests while keeping your main network secure.
- Does the Netgear AC1200 support parental controls? Yes, the Netgear AC1200 includes built-in parental controls that allow you to block specific websites, set time limits for internet usage, and monitor online activity for connected devices.
Read Also:
Conclusion
If your WiFi speed is slow or it faces any lagging, then the Netgear AC1200 WiFi range extender setup is the optimal solution for you. Netgear AC1200 WiFi range extender setup will help you boost your WiFi network, and you can access it from anywhere from your house.
Hoping that the article was helpful enough. If you still face any problems then do let us know. See you until next time! Ciao!